

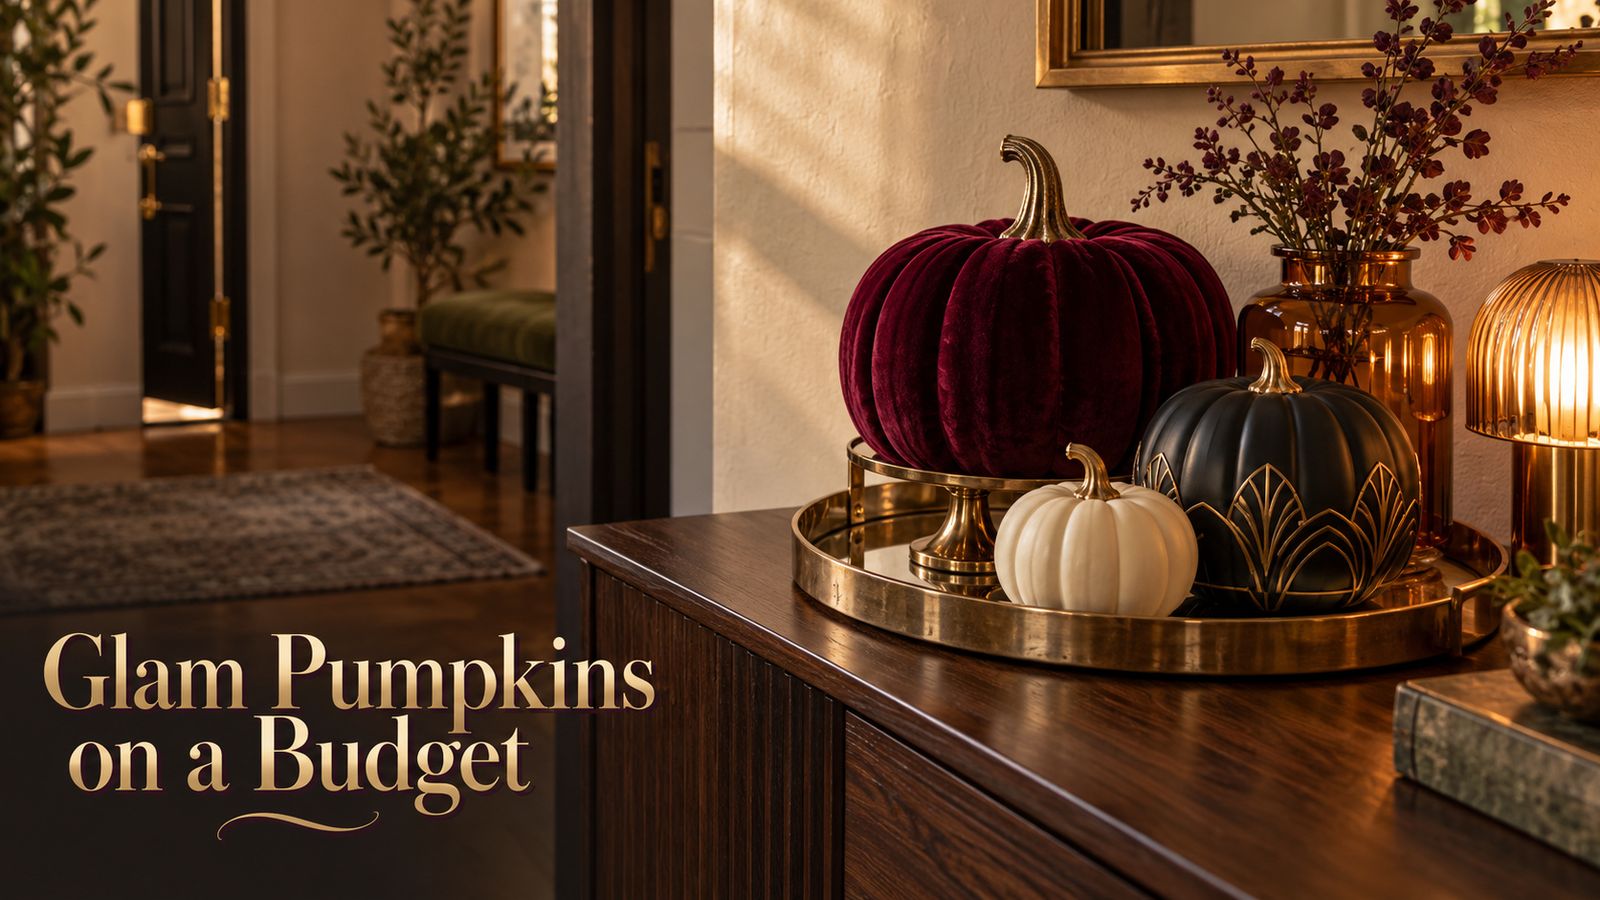
Glam pumpkins can make a small apartment feel polished, warm and ready for Halloween without covering every surface in orange plastic. The challenge is that the prettiest examples often involve expensive velvet pumpkins, oversized displays and storage space most renters simply do not have.
I learned this the slightly embarrassing way. I once spread a collection of mini pumpkins across a coffee table, bookcase, kitchen counter and windowsill because I thought repetition would make the apartment feel cohesive. It did not. It looked as though I had opened a seasonal-decor box and stopped halfway through unpacking it.
The problem was not the pumpkins. It was the absence of a boundary.
The most convincing glam pumpkin decor uses fewer pieces, one controlled palette and a clear anchor. That is why this guide focuses on no-carve, renter-friendly arrangements that look expensive but remain easy to store when Halloween is over.
The Quick Answer: How Do You Make Glam Pumpkins Look Expensive?
Use the 3-2-1 formula:
- Three pumpkins or decorative objects
- Two visible heights
- One existing anchor, such as a tray, book stack or folded textile
That final element is the $0 rule: group the display on something you already own before buying another pumpkin. A tray, cutting board, stack of books or shallow basket visually contains the arrangement. Once the pieces share a boundary, they look like one deliberate vignette instead of scattered seasonal clutter.
For most small apartments, the best starting combination is one medium matte pumpkin, one small velvet or ribbon-covered pumpkin and one metallic accent on a tray. Leave at least one-third of the surrounding surface empty.
Why Glam Pumpkins Are Peaking on Pinterest Now
Pinterest Trends shows the search phrase “glam pumpkins” climbing close to its annual high during the final week of September. Interest was quiet for most of the year, began rising rapidly before October and is now near the top of the 0-to-100 interest index.
That pattern matters because people are no longer casually collecting fall inspiration. They are actively deciding what to make, buy and display for October. A useful article published during this phase should answer the questions a beautiful Pin cannot answer by itself: Which look is affordable? How many pumpkins are enough? Which materials store easily? What makes one arrangement look collected while another looks cluttered?
If you want a broader renter-safe Halloween plan, pair these ideas with my Halloween apartment decor on a budget guide. That article covers the whole room; this one goes deeper on a single high-impact seasonal focal point.
Glam Pumpkin Ideas Ranked by Cost, Storage and Visual Impact
Prices are planning ranges, not guarantees. Use what you already own first, then shop only for the missing material or finish.
| Rank | Glam pumpkin idea | Estimated cost | Storage need | Visual impact |
|---|---|---|---|---|
| 1 | Anchored three-pumpkin tray | $0–$8 | Low | 5/5 |
| 2 | Velvet-ribbon pumpkin | $5–$12 | Low | 5/5 |
| 3 | Thrifted brass riser display | $5–$15 | Low | 5/5 |
| 4 | Matte-and-metallic pumpkin pair | $8–$18 | Low | 4.5/5 |
| 5 | Satin-bow pumpkin | $4–$10 | Very low | 4.5/5 |
| 6 | Vintage-brooch pumpkin | $3–$12 | Very low | 4.5/5 |
| 7 | Mirrored-tray pumpkin vignette | $10–$25 | Medium | 4.5/5 |
| 8 | Black-and-gold Art Deco pumpkin | $8–$16 | Low | 4/5 |
| 9 | Burgundy velvet pumpkin cluster | $15–$35 | Medium | 4/5 |
| 10 | Pearl-trim mini pumpkins | $6–$15 | Very low | 4/5 |
| 11 | Pumpkin under a glass cloche | $12–$30 | Medium | 4/5 |
| 12 | Pumpkin-and-book stack | $0–$8 | Very low | 3.5/5 |
| 13 | Amber-glass pumpkin vignette | $5–$20 | Low | 3.5/5 |
| 14 | Entryway console trio | $8–$20 | Low | 3.5/5 |
| 15 | One tiny kitchen pumpkin | $3–$8 | Very low | 3/5 |
1. Build an Anchored Three-Pumpkin Tray
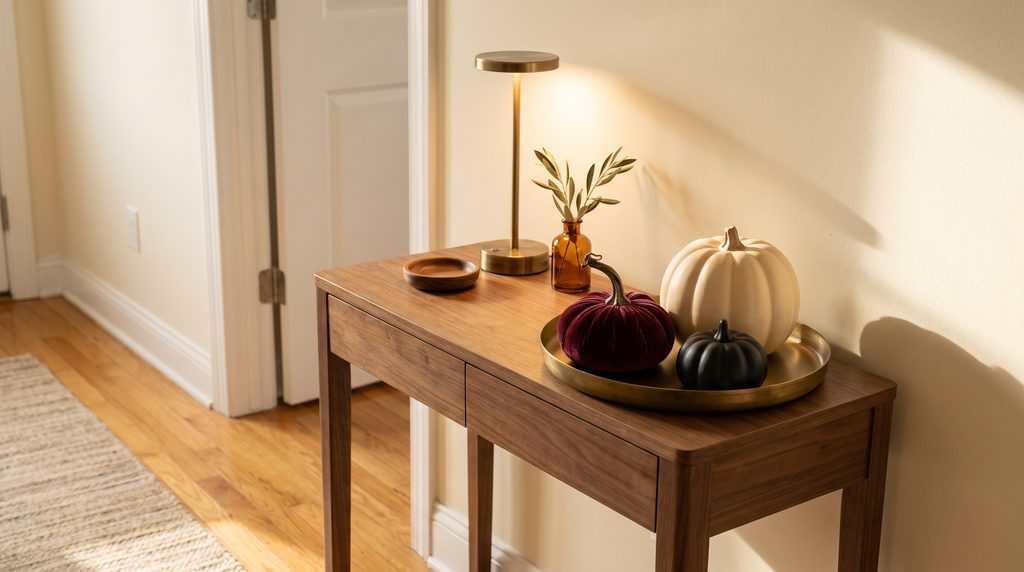
This is the most useful glam pumpkin idea because it changes the arrangement without requiring a new decorative product.
Choose a tray you already own and place one medium pumpkin slightly off center. Add a smaller pumpkin at the front and a third object—another mini pumpkin, a brass candleholder or a short vase—on the opposite side. Raise one piece on a closed book if everything sits at the same height.
Keep the palette controlled. Cream, muted terracotta and aged gold feel warmer; black, burgundy and antique brass feel moodier. Avoid using five different finishes simply because they are all individually pretty.
The tray should remain visibly larger than the objects. When decorations hang over every edge, the anchor stops doing its job.
2. Wrap a Plain Pumpkin With Velvet Ribbon
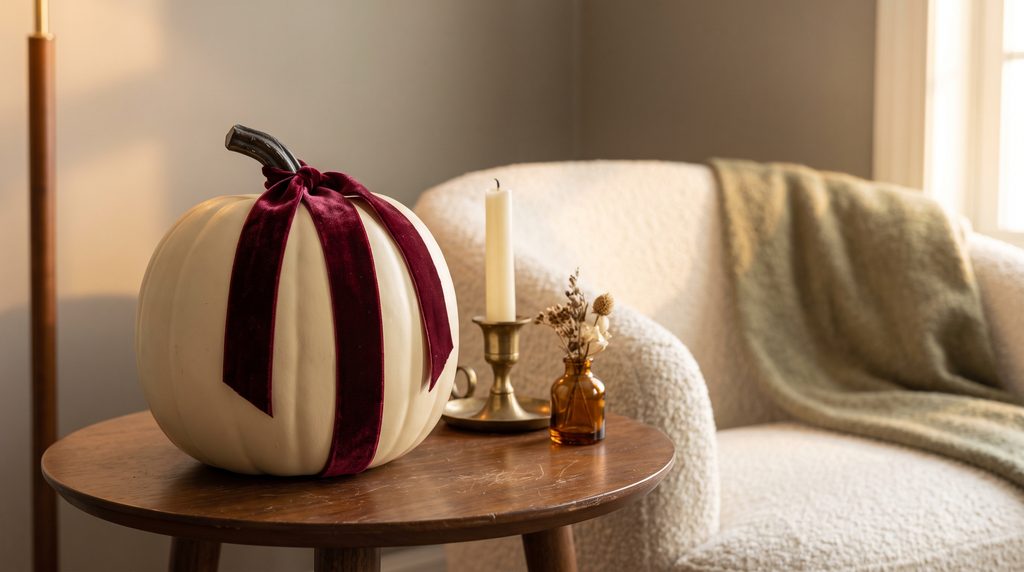
You do not need to cover an entire pumpkin in expensive velvet. A wide strip of velvet ribbon running vertically from the stem to the base creates the same soft, light-absorbing contrast for much less money.
Use a removable fastening method appropriate for the pumpkin material. On a reusable faux pumpkin, attach the ribbon beneath the base or secure it around the stem without permanently gluing every section. Deep plum, moss green, rust and chocolate brown all work beautifully with cream walls and warm wood.
This treatment photographs especially well because the plush ribbon contrasts with the pumpkin’s matte surface. It also stores flat once removed.
3. Use a Thrifted Brass Candlestick as a Riser
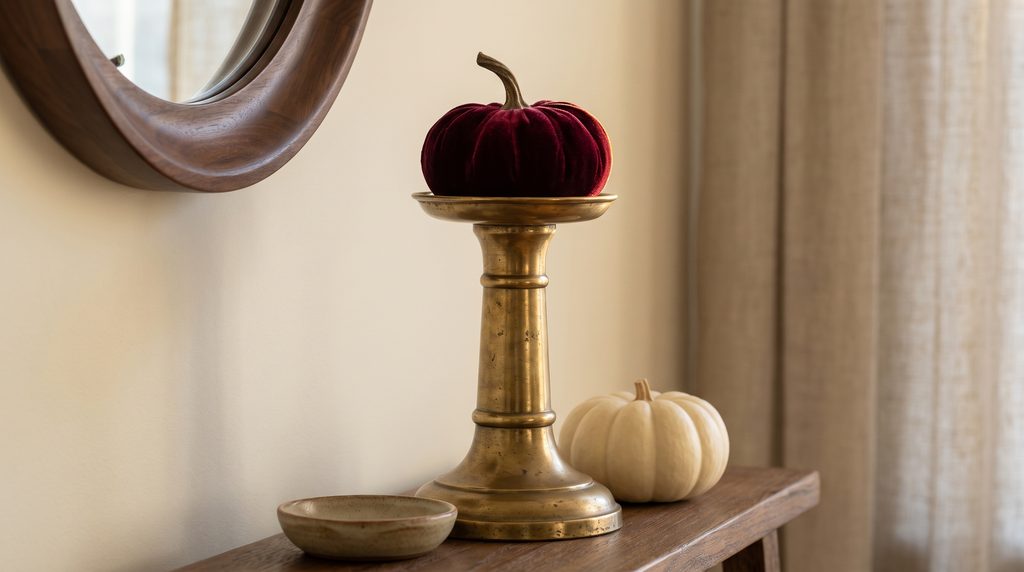
One of my favorite shortcuts is to treat a small pumpkin like an object in a collected still life rather than a holiday prop. Place it on a sturdy brass candlestick, low compote or footed dish.
Check that the pumpkin sits securely and that the base cannot tip. This works best on a console, dresser or shelf that will not be bumped. A riser provides the second height required by the 3-2-1 formula and helps a tiny pumpkin command more attention.
Do not buy a matching set. One aged brass piece beside matte cream or velvet will look more layered than three identical shiny stands.
4. Pair Matte and Metallic Finishes
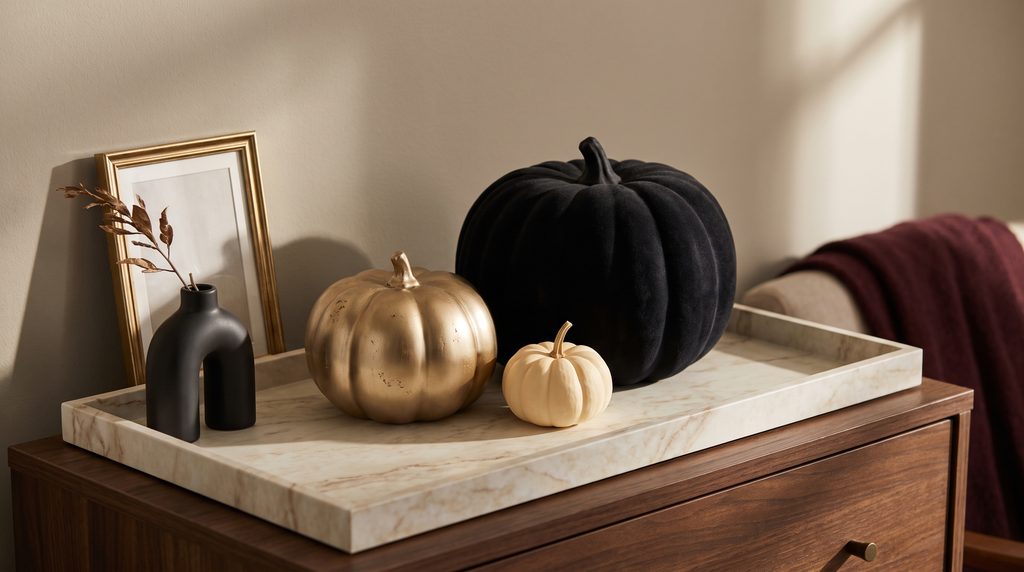
Metallic glam pumpkins can look striking, but a full row of reflective gold often reads more like party merchandise than elevated decor. The better approach is contrast.
Pair one antique-gold or champagne pumpkin with two matte pumpkins in cream, black, clay or burgundy. Keep the metallic piece smallest so it behaves like jewelry rather than the entire outfit.
If you are updating faux pumpkins, choose a softly aged finish instead of mirror-bright spray paint. Protect the work surface, follow the product directions and allow the coating to cure completely before bringing it back into the room.
5. Tie One Sculptural Satin Bow
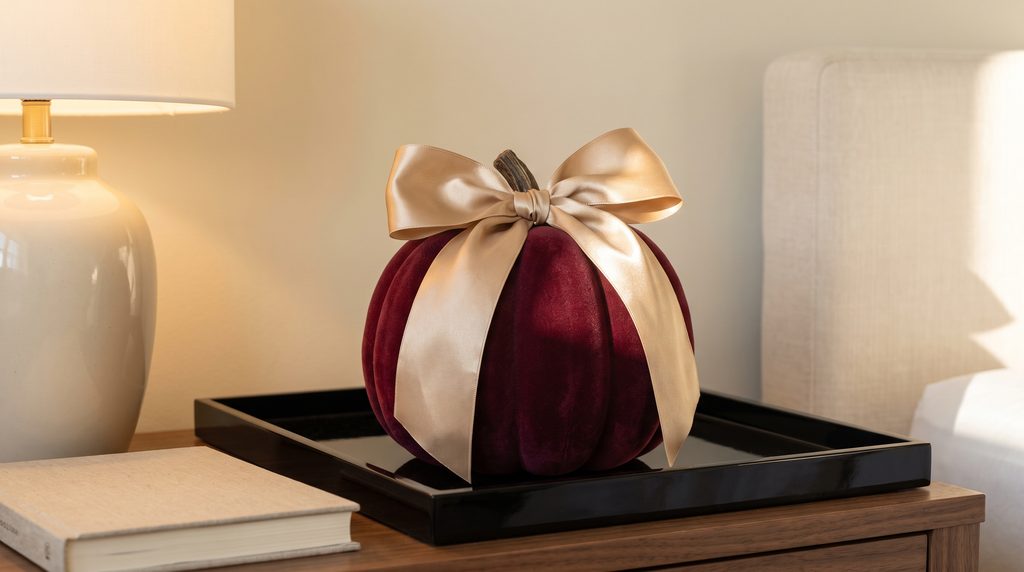
A satin bow is an inexpensive way to turn a plain pumpkin into a focal piece. Choose wide ribbon and keep the tails short enough that they do not trail across the table.
Place the bow close to the stem rather than wrapping the whole pumpkin like a gift. Black satin looks dramatic against cream; dusty rose softens terracotta; deep olive feels elegant without becoming overtly Halloween-themed.
One bow is enough. Repeating bows on every pumpkin removes the hierarchy and makes the arrangement feel like a coordinated craft set.
6. Add a Vintage Brooch at the Stem
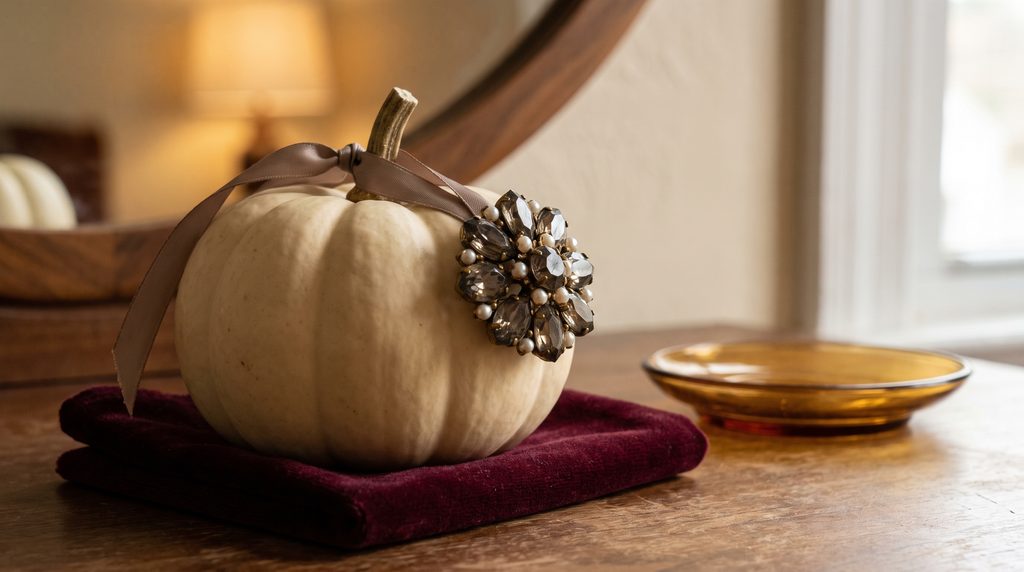
Small vintage brooches, clip-on earrings or decorative shoe clips can give glam pumpkins a collected, heirloom quality. Use one piece as a removable accent near the stem.
Avoid pushing sharp pins directly into a real pumpkin where someone could be injured during handling. Fasten the jewelry to ribbon or a removable fabric collar instead. If children or pets can reach the display, skip loose jewelry and beads entirely.
The strongest combination is surprisingly restrained: one cream pumpkin, one narrow velvet collar and one aged-gold brooch.
7. Style Glam Pumpkins on a Mirrored Tray
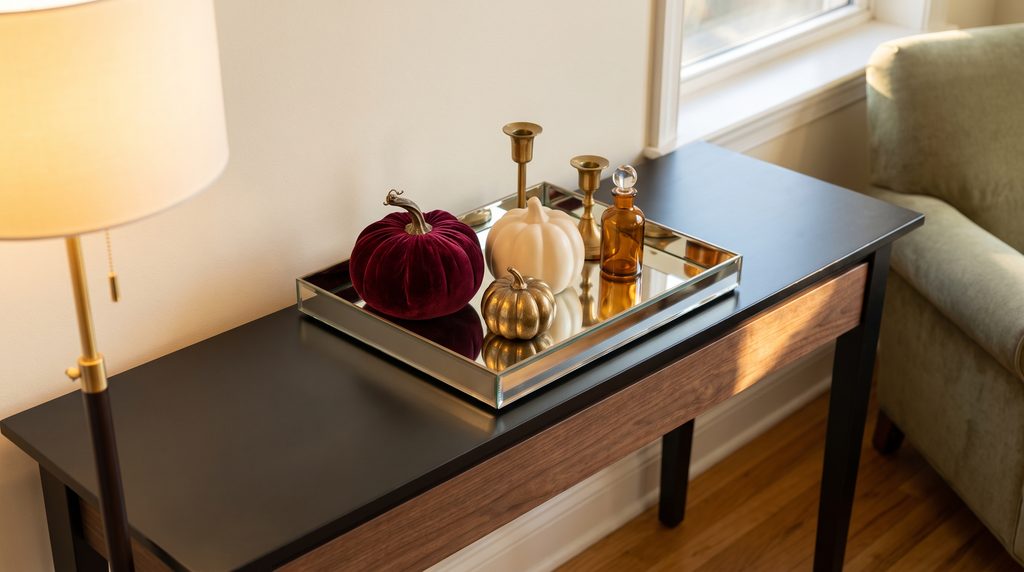
A mirrored tray multiplies light and makes a small display feel fuller, which is useful when the budget only allows two or three pumpkins. It works particularly well on a dresser, closed cabinet or entryway console.
Keep fingerprints and dust under control because reflective surfaces reveal both immediately. Place a small textile, paper doily or felt pad beneath hard objects to prevent scratching and soften the arrangement.
Do not cover the entire mirror. A visible border of reflection is what gives the display its depth.
8. Create a Black-and-Gold Art Deco Pumpkin
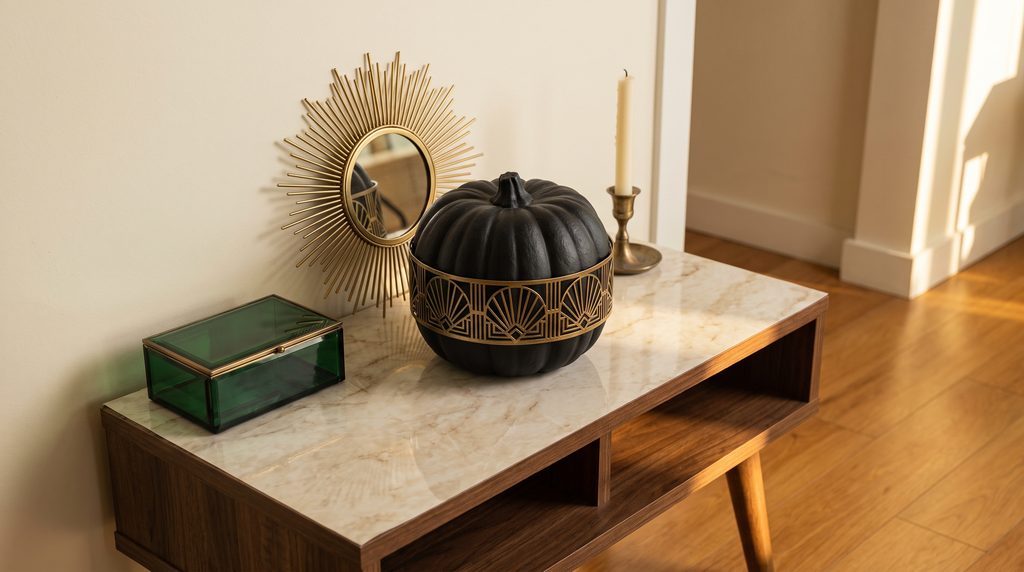
For a more graphic interpretation, use a matte black faux pumpkin with restrained gold lines or fan-shaped details. Think thin geometry rather than an all-over pattern.
This idea works especially well if your room already contains black hardware, brass lighting or an Art Deco mirror. Repeat one existing line from the room—a curve, sunburst or stepped edge—so the pumpkin appears connected to the decor.
Limit the pattern to one feature pumpkin and surround it with plain pieces. The eye needs somewhere to rest.
9. Use Burgundy Velvet Pumpkins as the Ancho
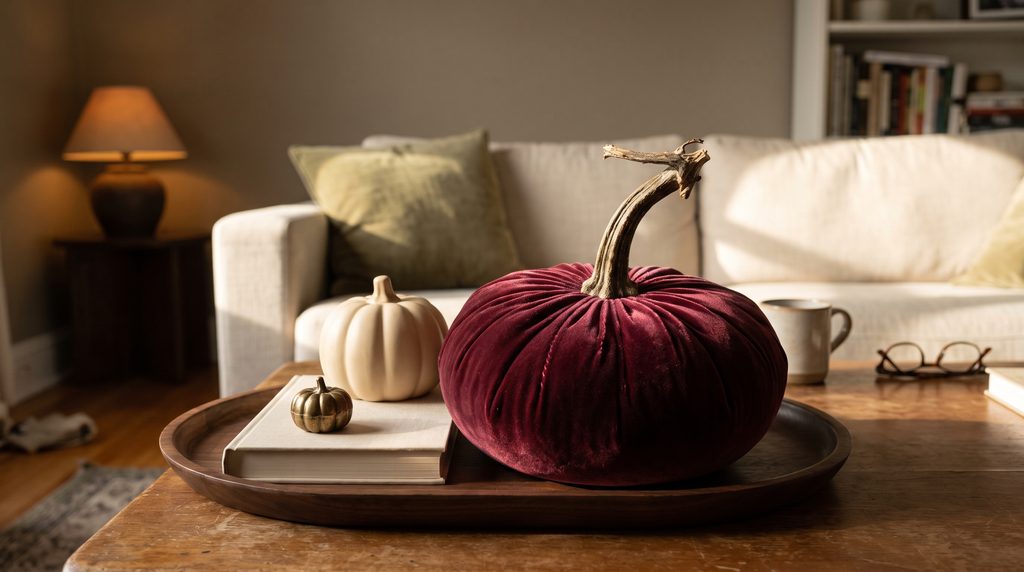
Real velvet pumpkins are beautiful, but they are often the most expensive option in the group. If you choose them, buy one medium anchor rather than a complete matching set.
Support it with inexpensive matte mini pumpkins or pinecones in neighboring tones. Burgundy pairs naturally with warm cream, dark wood, antique brass and faded olive—the same palette many small apartments already use for fall.
Store velvet in a breathable container and avoid crushing it beneath heavier seasonal decorations. The material loses much of its appeal when the pile is permanently flattened.
10. Add Pearl Trim to Mini Pumpkins
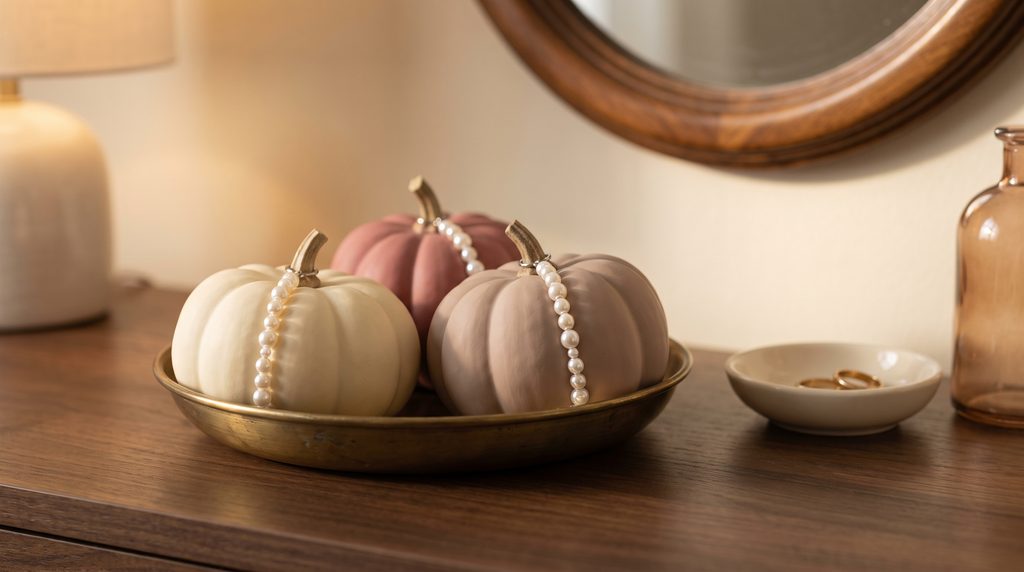
Pearl trim creates a glam effect without requiring paint or carving. Wrap a short strand around the upper third of a mini faux pumpkin or place a detachable pearl collar beneath the stem.
Use pearls as a narrow highlight, not a full covering. A pumpkin buried in beads can become visually noisy and considerably harder to store.
Secure every component carefully. Loose beads are unsuitable for homes where young children or pets can access the display.
11. Place One Pumpkin Under a Glass Cloche
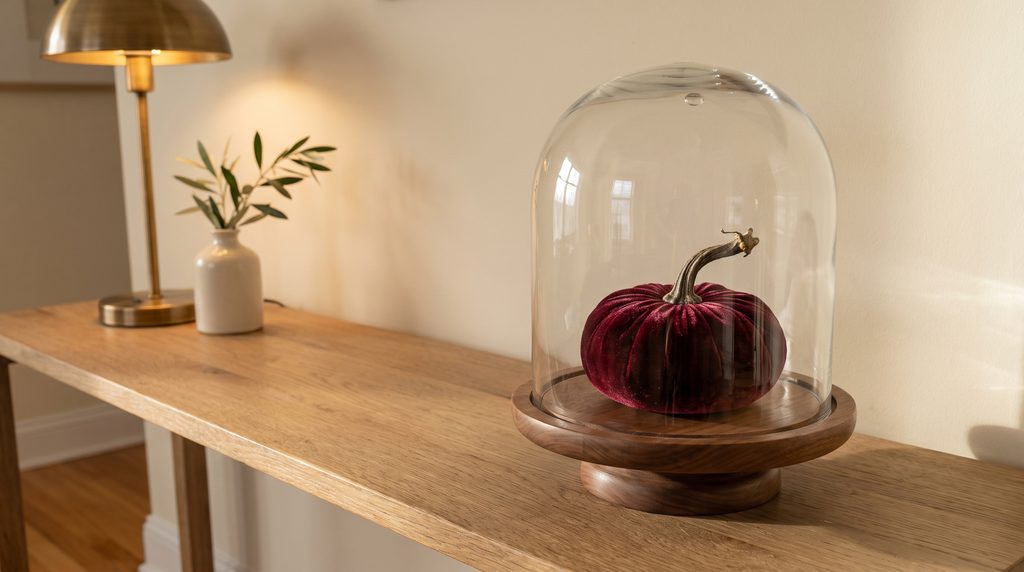
A cloche instantly establishes importance. Put one small velvet, metallic or patterned pumpkin beneath it and leave space around the object.
This is a good use for an existing cake dome or display cover. Do not buy a specialized Halloween cloche if you would not use it during the rest of the year.
Place glass away from the edge of the table and outside high-traffic routes. In a very small apartment, an acrylic cover may be more practical than heavy glass.
12. Raise a Pumpkin on a Stack of Books
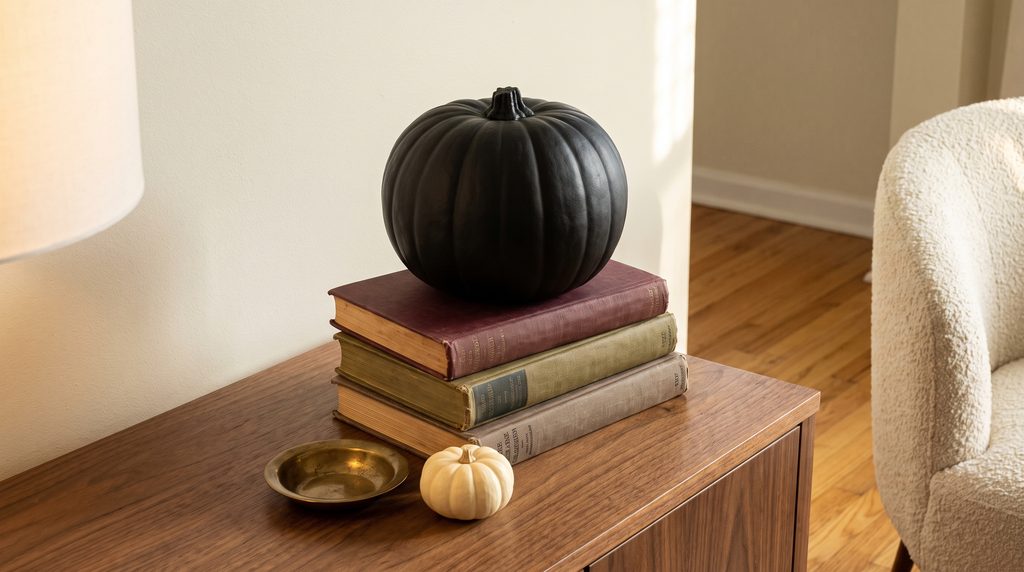
Closed books create height for free and allow a small decorative piece to compete with a lamp or vase. Choose two books with quiet covers, align them neatly and position one pumpkin slightly off center.
I prefer turning overly bright book spines toward the wall during the display. It keeps the palette controlled without covering or altering the books.
Do not build a precarious tower. Two books are usually enough to establish a visible height difference.
13. Pair Pumpkins With Amber Glass
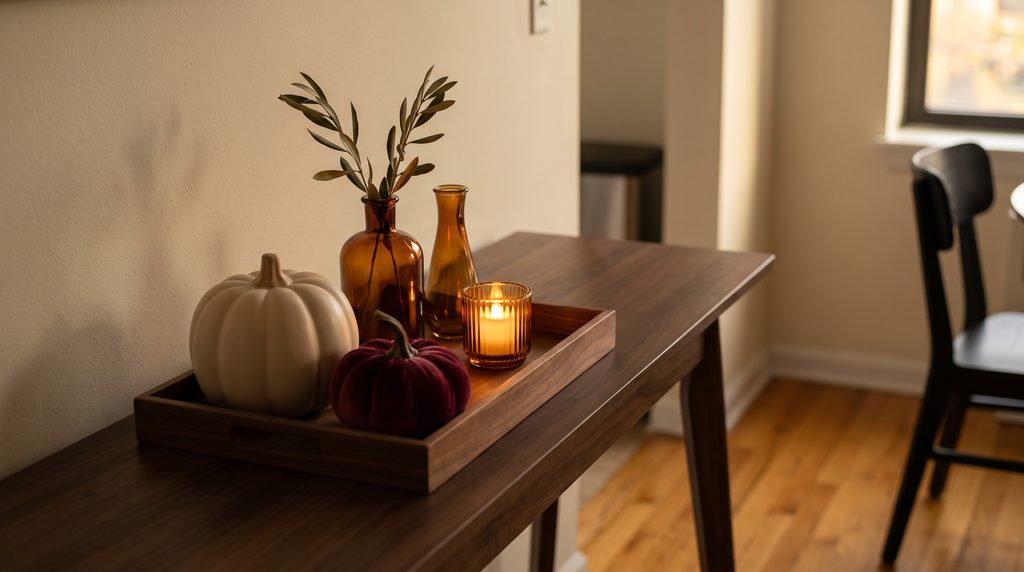
Amber bottles and small glass vases add translucency to an arrangement dominated by soft or matte materials. Group one bottle with two pumpkins on a walnut tray or cutting board.
Leave the bottle empty or use one short dried stem. A large bouquet can hide the pumpkins and turn a compact vignette into a crowded centerpiece.
This combination transitions easily from Halloween into Thanksgiving. Remove the darker accent after October and keep the pumpkins, warm glass and wood.
14. Make a Three-Piece Entryway Display
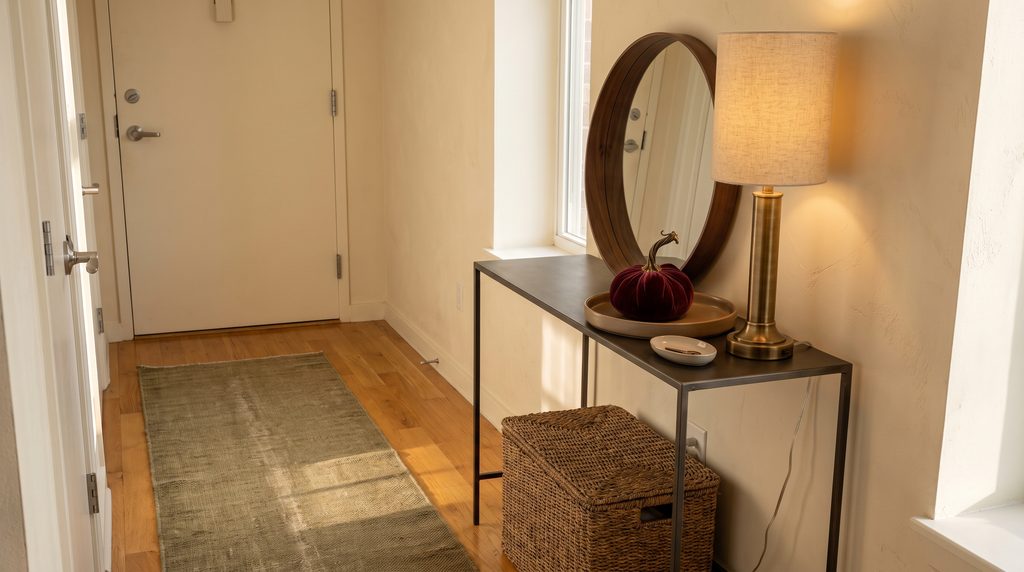
A rental entryway needs to remain functional. Place one medium pumpkin, one elevated mini pumpkin and one practical object—such as a key bowl—on a narrow console or closed cabinet.
Keep at least half the surface available for everyday use. If the display interferes with keys, mail or bags, it will be dismantled long before Halloween.
Avoid putting pumpkins on the floor beside the door. Even a beautiful arrangement is unsuccessful if it narrows the entrance or becomes a tripping hazard.
15. Use One Tiny Glam Pumpkin in the Kitchen
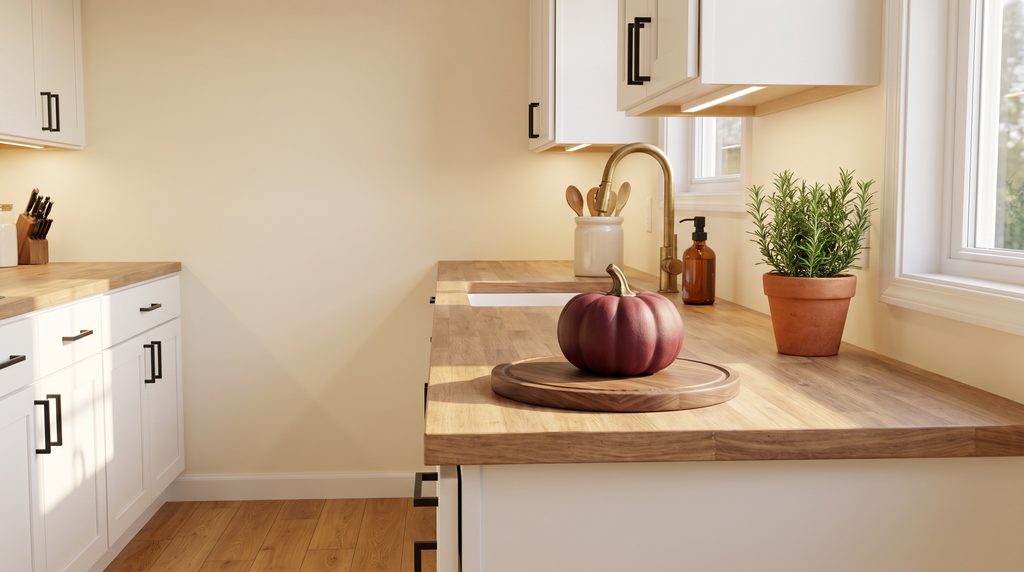
The kitchen rarely needs a full seasonal display. One small pumpkin beside a coffee station, utensil crock or closed canister is enough to repeat the theme.
Keep it away from the stove, sink and food-preparation area. Choose a washable faux material rather than velvet if the surface is exposed to cooking residue.
This is the final repetition point, not another focal display. The living-room vignette should remain the star.
The $25, $50 and $100 Glam Pumpkin Plans
Around $25: improve what you already own
- Use an existing tray or cutting board
- Style three inexpensive mini pumpkins
- Add one velvet ribbon or satin bow
- Raise one pumpkin on books
- Repeat one existing brass or amber object
The result should be one complete focal point, not several unfinished arrangements.
Around $50: add one premium texture
- Buy one medium velvet pumpkin
- Support it with two inexpensive matte pumpkins
- Add a thrifted brass riser
- Use an existing tray
- Repeat the palette with one pillow cover or short ribbon accent
Spend the largest share on the anchor piece rather than on five tiny accessories.
Around $100: create two connected zones
- Build one main console or coffee-table vignette
- Repeat one mini arrangement in the entryway
- Add a mirrored tray or cloche that can be used year-round
- Choose one reusable textile accent
- Stop before every surface becomes seasonal
More money should improve materials and versatility—not increase the number of pumpkins indefinitely.
How to Prevent Glam Pumpkin Decor From Looking Cluttered
Give the collection one boundary
Use a tray, board, book stack or textile. The boundary tells the eye that several objects belong together.
Create only two focal zones
In a small apartment, one main display and one subtle repetition are usually enough. A third zone should be tiny and functional.
Repeat finishes, not identical objects
Repeat antique brass, cream ceramic or burgundy velvet. Avoid buying exact duplicates in several sizes unless the room needs strong symmetry.
Leave visible empty space
At least one-third of the table, shelf or console should remain open. Negative space makes inexpensive objects appear more important.
Use flameless lighting
Velvet, ribbon, paper and dried stems should never crowd an open flame. The U.S. Consumer Product Safety Commission recommends battery-operated lights or glow sticks in jack-o’-lanterns and advises keeping burning candles away from combustible decorations. Review its Halloween decoration safety guidance before using illuminated displays.
How to Store Glam Pumpkins in a Small Apartment
Storage should influence what you buy before checkout.
Choose nesting or compressible pieces where possible. Ribbon, bows, removable collars and textile covers store almost flat. Mini faux pumpkins fit into lidded bins more efficiently than oversized statement pumpkins. Keep velvet pieces protected from crushing, remove batteries from lights and wrap mirrored or glass accessories separately.
Label one container for fall and Halloween instead of creating a bin for every micro-theme. If a decorative object cannot fit inside the container, it needs to replace something rather than join the collection.
My personal test is blunt but useful: if I would resent finding storage for the piece on November 1, I do not buy it in September.
Frequently Asked Questions About Glam Pumpkins
What colors make pumpkins look glamorous?
Cream, burgundy, matte black, deep olive, dusty rose, champagne gold and antique brass all create a sophisticated palette. Use one dominant neutral, one rich accent and one metallic finish rather than combining every glam color at once.
How many glam pumpkins should I display?
Start with three pumpkins or two pumpkins plus one supporting object. Three pieces provide enough variation for different heights without overcrowding a small surface.
How can I decorate pumpkins without carving them?
Use removable ribbon, velvet collars, bows, brooches, pearl trim, matte paint or metallic detailing on faux pumpkins. No-carve designs last longer and are easier to reuse.
Can glam pumpkin decor work in a neutral apartment?
Yes. Choose cream and taupe pumpkins, then add one controlled metallic or velvet accent. Texture supplies the interest without requiring a bright orange palette.
How do I make inexpensive faux pumpkins look expensive?
Reduce the number of visible finishes, group the pumpkins on one anchor, introduce two heights and leave empty space around the arrangement. Presentation usually changes the result more than buying another decorative pumpkin.
Are velvet pumpkins practical for small apartments?
One or two can be practical, but large matching sets require more storage. A single velvet anchor combined with smaller matte pumpkins gives a similar effect with less cost and volume.
When should I publish glam pumpkin content on Pinterest?
Publish before or during the rapid seasonal rise, not after Halloween inspiration has peaked. The current trend curve is already close to its annual high in late September, so the article and first Pin should go live immediately. High-quality seasonal Pins can also resurface in future years.
Final Thoughts
Glam pumpkins do not look expensive because they are covered in gold, velvet and pearls. They look expensive when each material has a clear role.
Start with the $0 rule: create one boundary using something you already own. Then apply the 3-2-1 formula—three objects, two heights and one anchor. Add one premium texture, repeat one finish and stop while there is still visible empty space.
That is the difference between a small apartment decorated for Halloween and a small apartment temporarily storing Halloween merchandise.
You May Also Like
Whimsical Christmas Decor fo ...
05 November 2026
Small Kitchen Christmas Deco ...
02 November 2026
Christmas Table Setting Idea ...
01 November 2026
Popular Post


Leave a Comment